 |
|

|
Tips From the Support Desk- updated 1/10/05 How
to Stop Printing - Check Spelling
in Edit - Edit Commands Current Tip- View those ASCII files before you send them off Most reporters
are unaware that you can view an ASCII file before you send it off
to a customer or your office. This feature is important because
it gives you the opportunity to review the converted transcript.
If any questions arise later on you'll know, with confidence, that
the file converted properly. If everything is correct on your end
then chances are the receiver is not doing something right. Once you've
converted a wrk file to an ASCII there are two ways you can look
at the end result using the AristoCAT software. The first is by
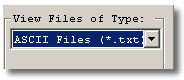
using the AristoCAT File Management Program. To the right of the
upper Reporter Folder window you'll find an area labeled 'VIEW FILES
OF TYPE'. Clicking on the black down arrow will display a drop-down
menu listing various file types. Select the catagory ASCII Files
and the Reporter Folder window will display all the ASCII type files.
Simply select the file The second method is to use the ASCII Conversion Program. Open the ASCII Conversion Program and automatically a window will open displaying your work files. Click the 'CANCEL' button and you'll see the ASCII Conversion Program background screen. From the headings click on 'VIEW>VIEW TEXT' and a window will open displaying all the ASCII files in your Reporter Folder. Select the file you wish you view and click 'OPEN'. The View Text window will open. Clicking the 'OK' button will close the window. Note: We are now suggesting you zip your ASCII & *.wrk files before sending thru the internet. The advent of ever more aggressive anti-spam & anti-virus software in use by internet service providers occassionaly creates changes in an ASCII or *.wrk file sent as an attachment. You may view your ASCII file before sending and all will be well but when it reaches the recipient random pound signs (#) appear throughout the text. These pound signs are footprints left behind by the aggressive anti-spam & anti-virus programs. A zip archive acts as a protective casing around the attachment. Be sure to make the recipient aware you'll be sending the material in a zip archive. The email feature of the File Management Program will automatically zip the files you have selected for emailing. More information on both the zip and email features can be found under the appropriate headings. Simply click on 'HELP' under each of the headings Changing the date in all your Include Files in a single step Open the File Management Program. Across the top of the window are headings. Click on the heading INCLUDE FILES>CHANGE DATE IN FILES. A warning will appear suggesting you backup your Include Files. If you wish to continue without backup click the YES button, if you want to take the time to backup your Include Files (select BACKUP from the headings of the File Management program) click the NO button. When you click YES the small window displayed below will appear:
Simply
enter the current date in the Include Files and then enter the new
year date and click OK. The program will search your Include
Files for the old date and replace it with the new. Simple!
Important Reminder! - Backup your Personal Dictionary particularly if its been awhile since you last did so. We can't stress enough how important it is to have a current backup of your Personal Dictionary and the process is quick and simple: 1. Place a newly formatted, labeled floppy diskette in your A drive (have additional formatted diskettes on hand in case the backup process requires more than one diskette). 2. Open
the Dictionary Management Program. Click on the heading 'PERSONAL
DICTIONARY>BACKUP/RESTORE>BACKUP'. The program will begin
the backup procedure. If necessary the program will prompt you to
insert additional diskettes. 3. Once the backup is finished find a safe, secure location for you backup diskettes. Note that you need to keep a copy of your personal dictionary with your computer and another copy off premise in the event of fire or theft. 4. If you want to back up your personal dictionary to different media than a floppy diskette (such as a CD or USB Flash Drive), use the File Management Program. Under View Files of Type choose Dictionary Files. Then make sure your Diskette Drive shows the device you want to back up to. 5. There
is a Backup menu option in the File Management program. This Backup
option will back up your personal dictionary, all information files,
include files and numerous other user files. It will zip all of
these files together and copy it to the Diskette Drive in one step. Chasing
100% Translation Since
time is money, particularly for court reporters, we are always looking
for ways to give the community of AristoCAT user's shortcuts for
getting transcripts out the door in the fastest way possible. To
that end we offer this tip on how to get almost 100% translation
early on in the production of your transcript. Of
course many of you are aware that when you view your notes using
the AristoCAT View Notes Program, pressing the F9 function key will
display the English translation for each steno stroke. Any steno
stroke not defined in either your personal dictionary or the job
dictionary will display as an untranslate. With the English now
in view, when you press the Home key the Steno program will stop
not only at FLAG strokes, but also at untranslates. At this point
you have the option of defining the untranlate and adding it to
your personal dictionary. To define an untranslate or to define
a mistranslate, place the cursor (highlight bar) on the last stroke
of the steno outline and press a number to indicate the number of
strokes for the definition. For example, if you are defining a two-stroke
outline, place the cursor on the second stroke and press 2. After
pressing a number to indicate the number of strokes, a dialog box
will appear allowing you to type in the English for the steno. Don't
forget to check the "Add to personal dictionary" box or
use the Alt+P shortcut key if you also want to add the definition
to the personal dictionary batch file. Note that any entries you
define this way automatically go into the job dictionary. The
steno program also colors the English differently to indicate where
the outline is defined. For example, if the English translation
is colored green this means the translation is in both the job dictionary
and the personal dictionary batch file. If the English is colored
blue this means the translation is in the job dictionary only and
finally, if the English is colored black the translation is only
in your personal dictionary. Note that you don't have to review
and update your personal dictionary batch file before you translate
since the entry you just defined is in the job dictionary and therefore
will translate. To save yourself a step it's possible to turn on the 'View English' function so each time you open the View Notes program, the English is displayed. Simply click on the 'Options' heading at the upper left corner of the View Notes program window and then click on 'Options' from the small menu. The options window will appear. Click on the white box to the left of the sentence 'Show translation when program starts'. A check mark will appear. Now, each time you open the View Notes program, the English translation will appear.
|
|
1.800.727.4786
(7-ARISTO) Site design by Butterfly Designs |
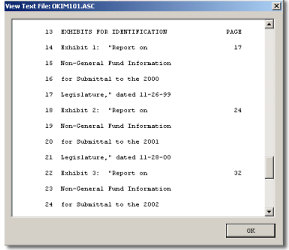 you
wish to view (only a single file can be selected to view at a time)
and click on the heading 'VIEW>VIEW TEXT FILES'. A small window
will appear displaying the selected file. Note: If you should
decide to send the converted ASCII file to your A drive then when
you go thru the process to view the ASCII you will have to navigate
to the A drive to select and view the file.
you
wish to view (only a single file can be selected to view at a time)
and click on the heading 'VIEW>VIEW TEXT FILES'. A small window
will appear displaying the selected file. Note: If you should
decide to send the converted ASCII file to your A drive then when
you go thru the process to view the ASCII you will have to navigate
to the A drive to select and view the file.